Lovely Composer User Manual (ver.1.2.0 + α)
* Please use web browser’s auto translation (If you are hard to read English). The content may differ from the latest version.
Index
Music Editor
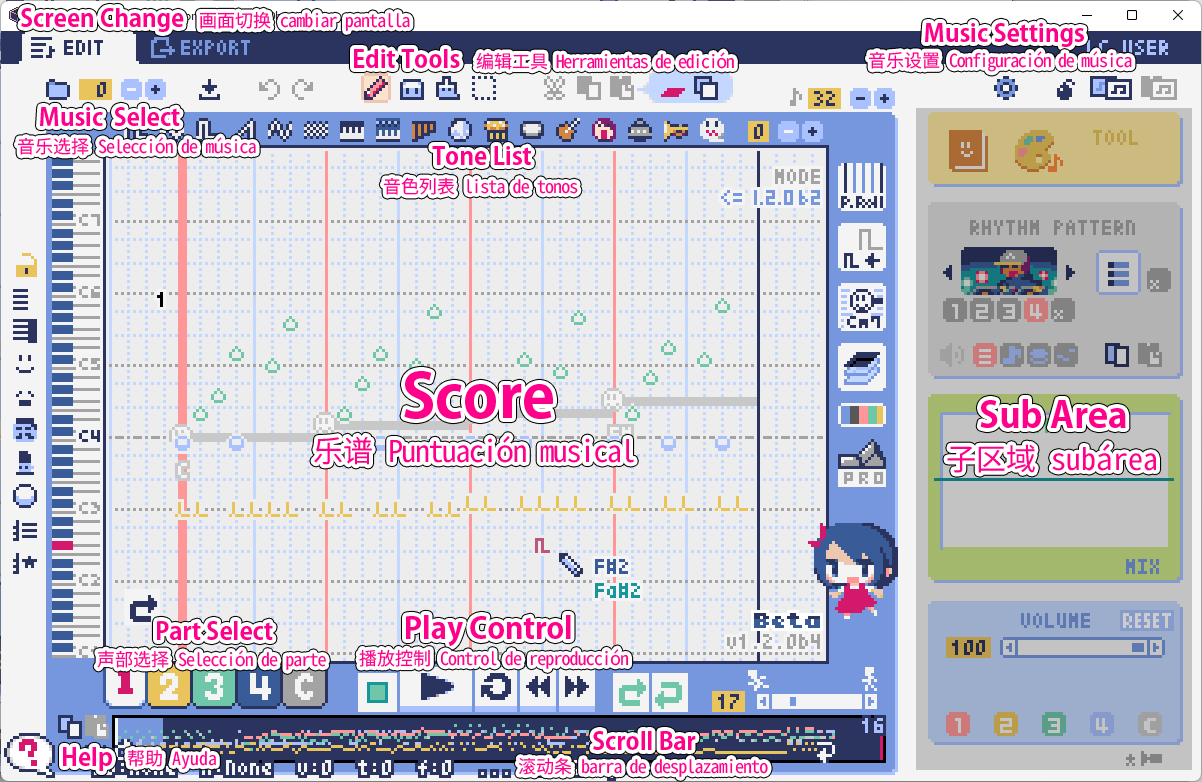
The basic screen layout looks like the image above. Each part will be explained later.
When the question mark is red at the bottom left of the screen, balloon help is displayed neighbour to the mouse cursor.
A text description of the area where the mouse cursor is located is displayed at the bottom of the screen. (It is a more detailed than the display in the balloon.)
Play Control

At the bottom of the screen, there are buttons for playing songs. The functions are as follows in order from left to right.
Stop … Stops playing the music. If you press the stop button while stopped, you will return to the beginning of the music. (You can also stop by pressing the space key during playback.)
Play … Plays the music. (You can also play by pressing the space key while stopped.)
1 page repeat (circular arrow) … Press the button to make it green so that loop playback is performed only on the currently open page. (This setting is a temporary playback setting that is not saved for each song.)
Fast forward … Moves to the next page.
Rewind … Moves to the previous page.
Loop start (Left side) … Press the button to turn green to set the return destination when looping to the current page. If you press it again in the green (on) state, it will turn gray (off) and the setting will be canceled.
Loop end (Right side) … Press the button to turn green to set the last part of the loop playback to the current page. The rest is the same as above.
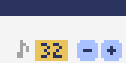
Tempo slider … You can set the playback speed of the music. The smaller the number (the cursor moves closer to the left), the faster the playback speed.
If the tempo is set to “Specify by page” in the music settings, a broken link icon will be displayed above the number. In this case, the tempo will be set separately for each page.

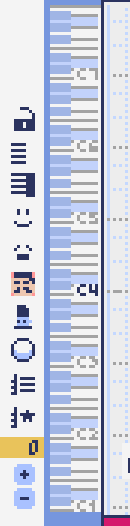
You can also moves current page with the bitmap scrollbar below the play button. The dots in each color represent musical notes. The currently selected page is displayed brightly, and the playback position is displayed as a white vertical line. The number on the upper right is the number of pages. The loop position is also displayed with an arrow icon.

Music Selection

There is a music selection button at the top left of the screen.
The numbers display the currently open song numbers. You can open the next music by pressing the “+” button and the previous song by pressing the “-” button. You can select the music number from 0 to 31. (* Plans to increase in the future)
You can select a folder by pressing the folder icon on the far left. A folder for users (LC_USER) and a folder for sample songs (LC_SAMPLE) are prepared in the default. (Also “_SFX” folders is prepared for sound effects.)
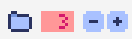
When the sample music folder is open, the music number is displayed in red as shown in the below image, and the file cannot be saved. please note.
If you have created a music in a write-protected state, use the music copy function to copy it to another music number.
The folder selection screen is as follows.
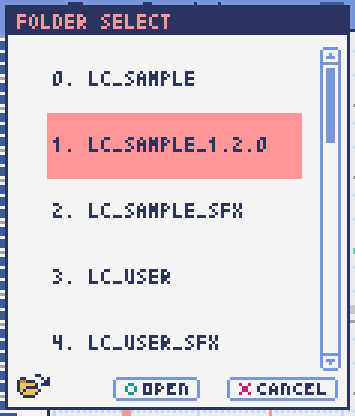
You can open the folder by selecting the folder name and pressing OPEN.
If you press the folder open icon at the bottom left, the actual folder containing the music data will be opened with Explorer on the OS side.
Save Music / Undo & Redo

It located the right of the music selection button.
The functions are as follows in order from left to right.
Save music file
Undo
Redo
Lovely Composer uses an auto save method, and music data is automatically saved in a file when moving music or closing the application.
Therefore, it is not always necessary to press the file save button, but if you press the button, the music data will be written to the file soon. So it is better to press it for avoid the data lost by abnormal termination of the application etc.
The actual music data is saved in the “Lovely Composer folder / music / selected folder / music number.jsonl” file.
Basic Editing Tools

It located the right of the save music button.
The functions are as follows in order from left to right.
Pen Tool
Eraser Tool
Brush Tool
Selection Tool
Cut
Copy
Paste
Specify the layer to be operated for selection tool (only the selected part / all parts)
Transparent copy specification for selection tool (normal copy / transparent copy)
Pen Tool
Left-click on the score to enter notes, and right-click to audition the selected tone. You can select the tone by right-clicking on the note.
Also You can lock the cursor to horizontal movement while holding down the Shift key.
Volume input in Pro mode allows you to specify the volume. You can specify the left and right of the sound in pan editing.
Eraser Tool
You can delete notes by left-clicking and dragging on the score.
Volume editing in Pro mode removes the volume specification or restores the default value. Also, in pan editing, the pan specification is deleted.
Brush Tool
You can change all the tones of the notes on the currently open page to other tones by left-clicking on the score. Click on a note to repaint only the sound with the same tone. You can also paint only the notes you traced by dragging.
When editing the volume in Pro mode, brush changes all notes volume with specified value. Also, in pan editing, the existing pan specificated notes is filled.
Selection Tool
You can select notes on the score. After the notes selecting, move the selection by dragging left or right, duplicate by Alt + dragging, and delete by pressing the Delete key. You can also change the pitch by dragging up and down. (Transpose)
The operation is the same for volume and pan editing in Pro mode so far.
Song-based Editing Tool

It located in the upper right corner of the screen, you can settings of music, copy & paste music, and clear musics (create new).
The functions are as follows in order from left to right.
Music settings
Bomb button (clear music data)
Copy music data
Paste music data
Also, in the text part on the upper right of the image, the name of the currently selected music folder is displayed.
You can also undo the clear of music data by “Undo”. (Don’t panic if you accidentally erase it!)
Music data for which write lock is set, such as sample musics, will not be saved even if these operations are performed.
Score (Piano Roll)
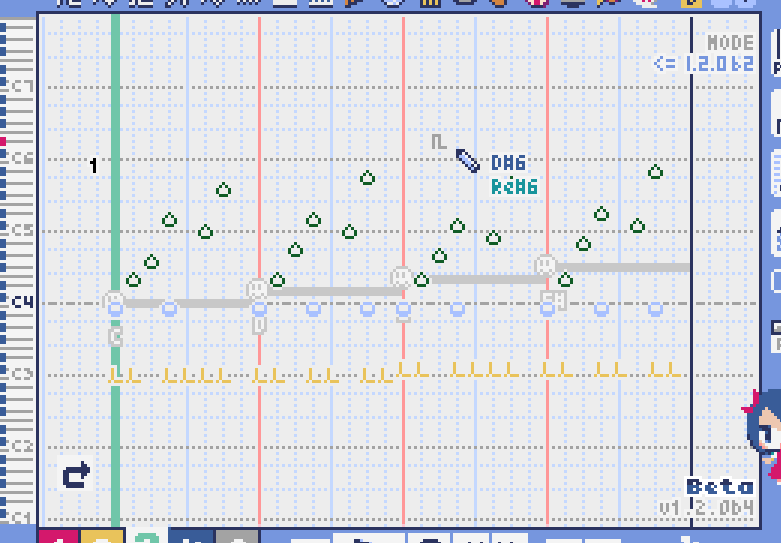
This is the main part of music editor, you can create a music by inputting and editing notes.
The display format called the piano roll, similar to the staff notation of music, the vertical axis is the pitch and the bars are separated by vertical lines. (It can also be changed to a staff-style display.)
The number in the upper left is the current page number. Use the fast forward button, rewind button, and page scroll bar to move pages.
Loop position, mute status, etc. are also displayed. In compatible playback mode, which version is compatible is displayed in the upper right.
The tone icon is displayed in the color of each part. By default, it is displayed as a small icon.
“Middle C (Do)” is the C4. It’s displayed by the horizontal dotted line.
By default, the notes of the non-selected part is display by pale color.
The roles of the normal part and the code part are slightly different.
Part Selection

You can display and edit the selected part by selecting any of 1/2/3/4/C with the part selection button at the bottom left of the score.
If you select any of 1/2/3/4, you can display and edit the normal tone part. The specifications of each part are the same.
If you select C, you can display and edit the code part. (C is an acronym for code = Chord)
Normal Part

When the normal part is selected, the tone list is displayed at the top of the score.
By left-clicking on the tone list, you can select the tone to use with the pen/brush tool. The tone list is divided into multiple pages, and you can switch to another page with the “+” and “-” buttons. The numbers display the current page number.
So far, the types of tones are roughly divided into the following.
Tone that keeps ringing
A tone that doesn’t keep ringing
A tone that smoothly connects neighbour tones (slur tone or glide tone)
Also,
You can audition the selected tone by right-clicking on the score.
The tone can be changed for each note.
Each tone is actually made up of “basic waveform + effect”. You can check which tone is made up of which combination in the help display at the bottom of the screen.
Tones with the same basic waveform can be heard to connect the sounds, by arranging them side by side.
Chord Part
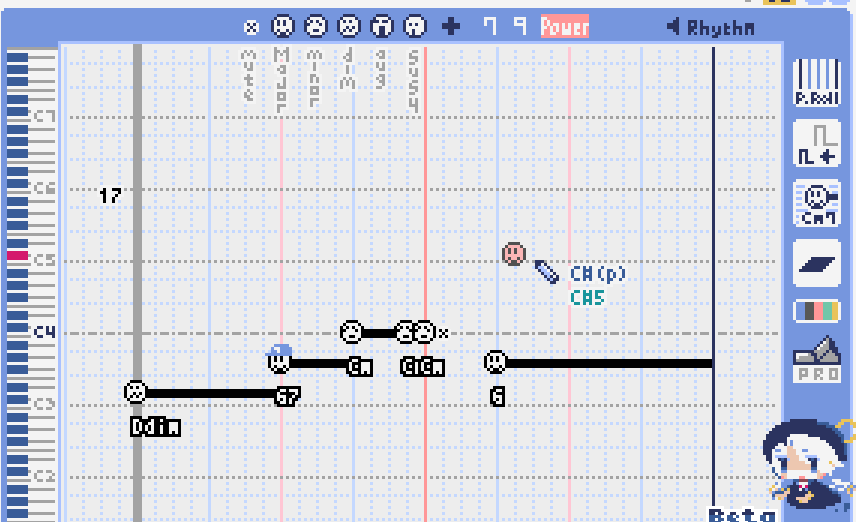
When the chord part is selected, the chord selection tool is displayed on the upper side of the score.
The selection of the basic chord is set by the face icon displayed on the upper side of the score, and the additional note is set by the button to the right of it.
The additional notes is displayed as a hat, and the power chord is displayed as an icon with a face color.
If you specify a chord in one place, it will continue to play the same chord until the next chord appears. (The black line will extend automatically)
If you want to stop the extend, specify the mute (“x” mark) at the position you want to stop.
You can audition the chords by right-clicking on the score. While “Rhythm” is displayed at the top, the rhythm pattern selected on the current page is used for playback, and for Tone, only the square wave is played. The pitch of the chord is displayed as a thick line, and each constituent note of the chord is displayed as a thin line.
Pro Mode
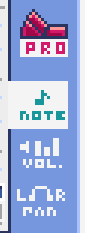
When the PRO switch at the top of the image is turned on (red state), a part of the screen will be switched and various buttons and advanced functions will be displayed.
In Pro mode, you can switch between note input, volume input, and pan input with the buttons in the image to input on the score.
Volume Input (Pro mode only)
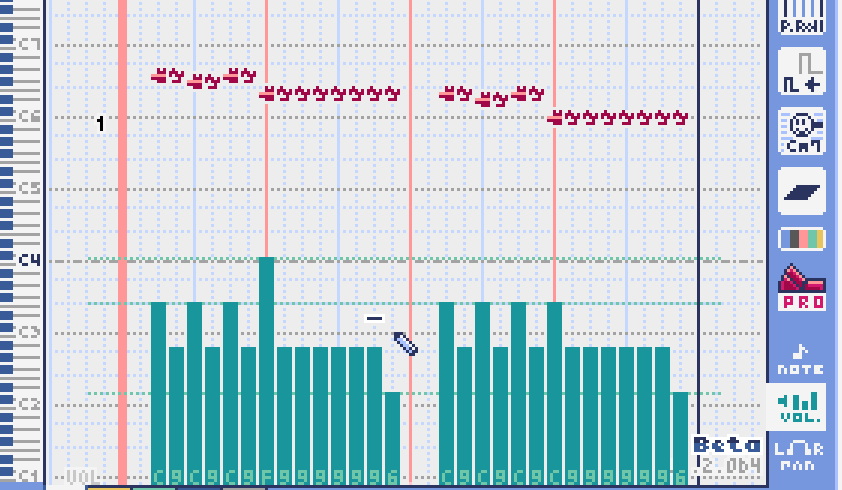
If you select the volume input tab in Pro mode, you can specify the volume at the bottom side of the score.
The volume value that can be specified is 16 levels from 0 to 15. (This is a specification assuming an 8-bit game machine.)
The default volume is 12 (= C), where 0 is completely silent.
In addition to the height of the bar, the volume is displayed as the number at the bottom (hexadecimal).
In hexadecimal, it represents A = 10, B = 11, C = 12, D = 13, E = 14, F = 15.
One step is uniformly 2 dB, and can be specified in the range of + 6 dB to -22 dB.
You can also enter the volume value by drawing with the pen tool while holding down the Alt key even on the normal note input tab.
Pan Input (Pro mode only)

If you select the pan input tab in pro mode, you can specify the position of the sound with the center / left / right. (note by note)
C is center, L is left, and R is right.
If you specify one place for pan, it will be carried over to after notes.
You can change the currently selected pan by moving the mouse wheel up or down.
Display Settings
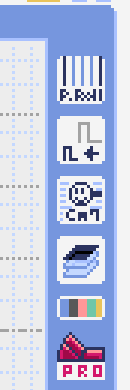
You can change the display settings of the score with the button on the right side of the score.
The functions are as follows in order from left to right.
Switching between piano roll display / staff like style display
Resize note icon
Turn on / off the display of chord names and the notes display of the sounds actually played in the rhythm pattern.
Switching the layer display method of the part (Layer transparent display / All layers normal display / Only selected layer display)
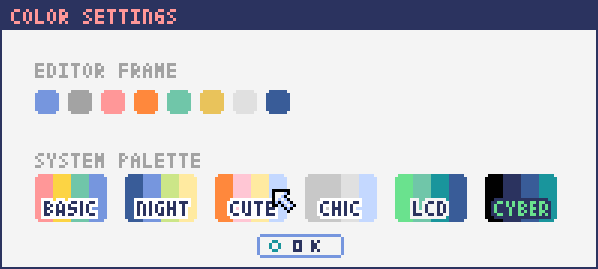
Background color setting in the window of the below image, specify the color of the editor and the color of the entire screen (system palette color).
Pro mode switching
The staff notation style display only changes the background image and does not display the correct staff notation (because it is a piano roll base, the lines may not be evenly spaced.)
Setting the number of notes per page
The number in the upper right corner of the score displays the maximum number of notes per page.
If you press the “+” button, you can increase it by 1 and set it up to 32.
If you press the “-” button, you can decrease by 1 and set to a minimum of 1.
The maximum number of notes is also displayed as a vertical line on the score. When the playback position bar crosses this vertical line, it moves to the next page.

If you set “by page” in the music settings, the broken link icon is displayed and you can set the number of notes for each page individually.
Page-based Editing Tool
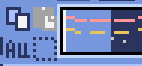
The bitmap scroll bar can be used not only for page navigation but also for editing music data on a page-by-page basis.
You can copy and paste the selected page with the button on the upper left. (Ctrl + C, Ctrl + V are also acceptable)
You can also delete it with the Delete key.
The operation target (focus) with the shortcut key is displayed in the border color. (Currently, switching only between the score and the bitmap scroll bar)
The focus can be switched by clicking the target part.
By pressing the selection tool button at the bottom right, you can select multiple pages and operate them all at once. You can move it by dragging the selection, and you can also duplicate it by dragging while holding down the Alt key.
Press the mode button at the bottom left to switch the operation target of page-by-page copy.
All (default)
Musical score data and rhythm pattern settings only (settings such as page tempo and number of notes are not copied)
Musical score data only
Only one part selected in the score data (can be copied to another part)
Rhythm pattern setting only
Page settings only (copy only settings such as tempo and number of notes for each page)
Scale Function
This function limits the pitches that can be entered according to certain rules, making it easier to enter musics with a specific scale. The pitches that cannot be entered are displayed on the keyboard. Also, when the icon selected, the sounds that are incremented one by one on that scale will be previewed.
The items are as follows in order from top to bottom.
(unlock scale)
White key only
Black key only
Major scale
Minor scale
Ryukyu scale
Gagaku scale
Whole tone (whole tone interval / skip one note)
Chord (only the pitch used in the chord can be used)
Magical Scale 1 (Excludes dissonant sounds of selected chords)
You can move the key up and down with the “+” and “-” buttons.
The two scales below are special scales that change depending on the chord entered in the chord part. If you select these, the key cannot be changed.
The scale function is disabled while you hold down the Ctrl key. This is useful when you want to temporarily input an unscaled pitch.
Tool List
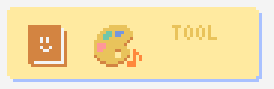
The start button of the convenient tool of the type to use by opening another window is displayed, and when you press it, the window opens.
The tools are as follows in order from left to right.
Chord pattern tool
Tone palette tool
Chord Pattern Tool
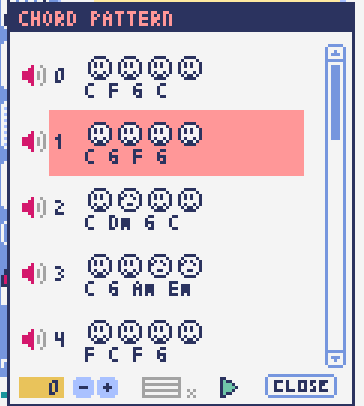
It is a tool that allows you to select and enter a standard chord progression from a list. Even if you don’t have any knowledge of chords, you can choose your favorite chord progression while actually playing and listening.
Left-click on any of the chord lists to set the selected chord pattern on the score.
Press the preview playback button (speaker icon) on the left end to preview the chord on the right side.
You can scroll the list by operating the scroll bar or by moving the mouse wheel up or down.
The bottom of the window is option settings.
If the play icon is enabled (green), the music will play at the same time as the chord pattern is set. (You can preview the sound of the current rhythm pattern.)
You can use the “+” and “-” buttons on the far left to move the key of the chord you enter up or down.
In the middle is the “chord number specification button for each page” (CHORD NUM / PAGE). If it is not specified (gray out), it depends on the “number of measures per page” in the music settings.
You can close the window by press the CLOSE button.
Tone Palette Tool

This is a convenient tool for collecting frequently used tones.
The tones freely selected by the user are displayed on the upper side, and the recently used tones are displayed on the lower side. Press the “+” button to add the currently selected tone to the palette.
You can select a tone by left-clicking on the tone icon and delete it by right-clicking. Press the clear button to remove all tones. Press the CLOSE button to close the window.
When the normal part is displayed, it switches to the normal tone palette. Also when it is a chord part, it switches to the chord palette.
Rhythm Pattern
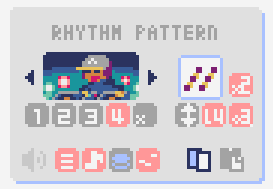
It is a function that adds various rhythms and accompaniment to the chords entered in the chord part. (Therefore, if no chord is entered, it’s will not work and nothing will sound.)

The picture above shows the currently selected rhythm pattern, which you can change with the left and right triangle buttons.
The default three-line icon only plays chords purely in chords, but changing to a different pattern will also add rhythm.
There are 4 types of sub-patterns for each, and you can choose one from the 1/2/3/4 at the bottom of the picture. The selected ones are displayed in color, and the others are displayed in gray.
The button to the right of the 4th sub-pattern is the playing speed of the rhythm pattern (number of bars per page). x1 plays 1 bar per page, x2 plays 2 bars per page, and x4 plays 4 bars per page. When grayed out, the value of “Number of bars per page” in the music settings is used.
Rhythm part setting

The rhythm pattern sound performance consists of four parts, and each performance can be turned on / off individually with the button at the bottom left of the image.
The icons are as follows in order from left to right.
Chords or arpeggios
Bass (low pitch)
Rhythm and percussion
Free part (free role for each rhythm pattern)
Arpeggiator

This function allows you to play the chord constituent sounds one by one (arpeggio) instead of playing them at the same time.
This is a popular technique because the number of simultaneous pronunciations is very limited on 8-bit game consoles and it is difficult to play chords at the same time.
If the icon image is in the state of three lines, arpeggiator is disabled. And if you select one with several dots lined up, arpeggiator is enabled. Plays the pitch of the arpeggio like a sequence of dots.
The button on the right is the playing speed of the arpeggio (number of bars per page). x1 plays 1 bar per page, x2 plays 2 bars per page, and x4 plays 4 bars per page. When grayed out, the value of “Number of bars per page” in the music settings is used.
The buttons are as follows in order from left to right.
Up and down arrows … Upside down pattern
L … Arpeggio length (L = Length … note based)
O … Add an octave change (O = Octave … does not move an octave when the color is gray)
Editing tools for rhythm pattern

The function are as follows in order from left to right.
Copy the current rhythm pattern
Paste the rhythm pattern
Using the page-based editing tool, you can also process multiple pages at once, which is convenient.
Output Monitor
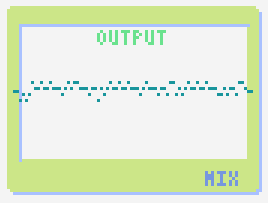
Displays the waveform of the sound currently being played like an oscilloscope. Since the synthesis result of all the output sounds is displayed, it responds not only to music but also to sound effects.
MIX … Displays the sounds of the left and right channels combined.
L & R … Displays the sounds of the left and right channels in different colors in the same area.
L / R … Displays the sounds of the left and right channels in separate areas.
Volume
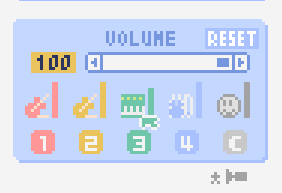
You can change the playback volume, mute each part, or specify solo playback. The settings here are not saved for each music.
In addition, the currently playing tone, etc. are displayed visually.
Left-click the part number to mute each part, and right-click to specify solo playback. Muted parts are also displayed as icons in the part selection section and on the score.
You can reset all settings to the initial values with the RESET button.
Pro mode adds volume and output channel display to the visual display. You will also be able to set the volume slider to 0.
The visual display shows the final result (same as the actual sound) by multiplying the music data and the values specified in the mixer.
The button at the bottom right of the volume is an extra function for greenback shooting (chroma key compositing) for shooting movies, etc., and fills background elements other than dancer-related with one color.
Adjustment Panel (Pro mode only)
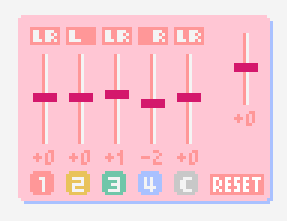
You can adjust the volume and output channel for each part of the entire music at once.
For the volume slider in the center, raise or lower the value specified for the volume on the score. In addition to left dragging, you can also increase or decrease by rotating the mouse wheel. Since the volume of each note does not exceed 0 to 15 (0 to F), the volume does not always change according to the value specified by the slider.
For the top output channel, only the displayed channel outputs sound. Click left or right to switch between LR / L / R.
The slider on the upper right raises or lowers the pitch of all parts (transpose). If you drag, it will change by about 3, but you can increase or decrease it by 1 by rotating the mouse wheel. It is also interesting to try changing the pitch by listening to the musics you made or sample musics.
Press the part number button to enable or disable the volume slider and channel settings. It can be used to check the adjustment result.
You can reset all settings to the initial values with the RESET button.
If L is specified for the pan on the score side and R is specified for the mixer side, the output sound will be silent. In that case, the volume display will be lightly grayed out.
Dancer
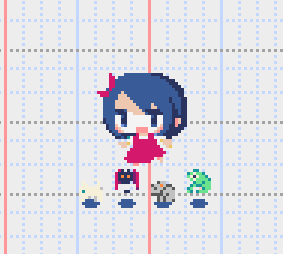
The characters of “Dungeon Witches” will sing and dance to the tempo of the music, and will perform various productions. It also indirectly acts like a metronome.
Left-click to change to another animation pattern, drag to move, right-click to zoom in / out.
The singing pitch is the pitch of the note of the selected part.
If the tempo of the music and the speed of the dance are too different, the music setting “bars per page” may be different from the actual music data.
Music Settings
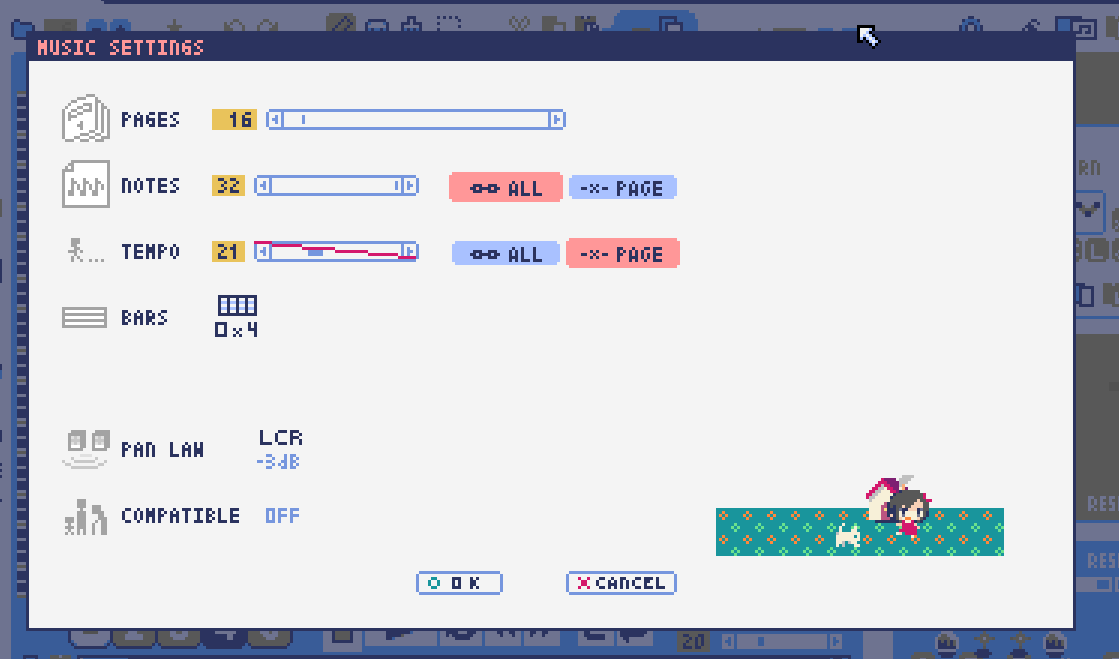
This is the screen for music setting.
In order from the above items,
number of pages
Number of notes per page (common to all musics / switching specified for each page)
Tempo (common to all songs / switching specified for each page)
Number of bars per page
The number of measures per page affects the number of measures such as the measure line on the score, BPM display, dance speed, and rhythm pattern when the number of measures is set automatically.
And the below settings are the part that normally does not need to be set.
Pan Law settings … Center and left / right volume balance settings
Compatibility mode setting … If specified, the song data will be played according to the specifications of that version (used only to prevent old data from playing strangely).
It has become.
The picture on the lower right has no function speciallly.
Tempo
The tempo is not an arbitrary BPM specification, but a speed specification method like old game music.
The BPM calculation formula is as follows, excluding the error.
BPM = (30 / speed) * bars per page * 30
“Speed” is the value on the left of the tempo slider. And the number of bars per page can be changed from 1 to 4 in the music settings.
In the initial state, 120 BPM = (30 / 30) * 4 * 30.
Balloon Help Display Button

Located at the bottom left of the screen, you can press it to turn on / off the balloon help display. Once you have learned all the operations, you can turn it off.
MIDI Input
You can play it on a MIDI keyboard using Lovely Composer’s tones.
(It does not support note input, UI operation, recording, etc.)
You can select the MIDI input device you want to use with the config tool in another executable file. It is enabled by default, but you can disable the input.
As of ver.1.2.0, there is a slight delay from input to pronunciation. (Because it is processed at 60fps)
Screen Switching Tab

The screen switching tab at the top left of the screen. Left-click to switch to the selected screen.
In order from the left items,
EDIT … Composition screen
EXPORT … Export screen
When switching screens, the music data being edited is saved as a file, and the history such as undo is cleard (it is not saved if write-protected).
Export Screen
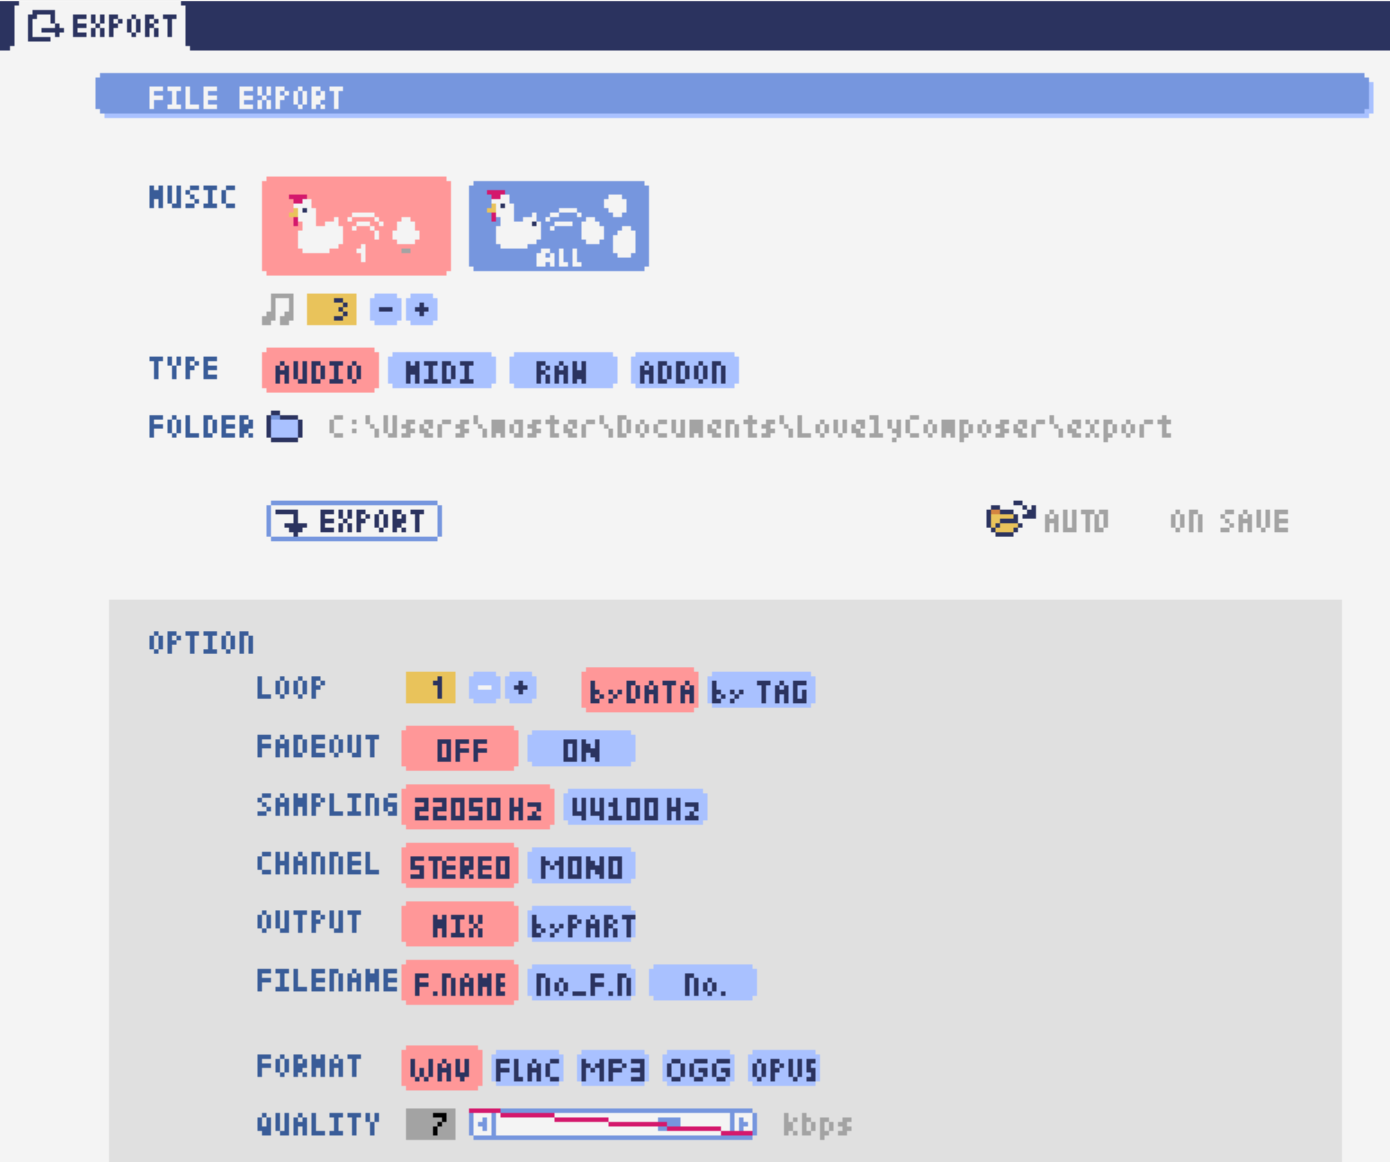
This screen is for outputting music data as an audio file or MIDI file, and other formats.
Common Settings
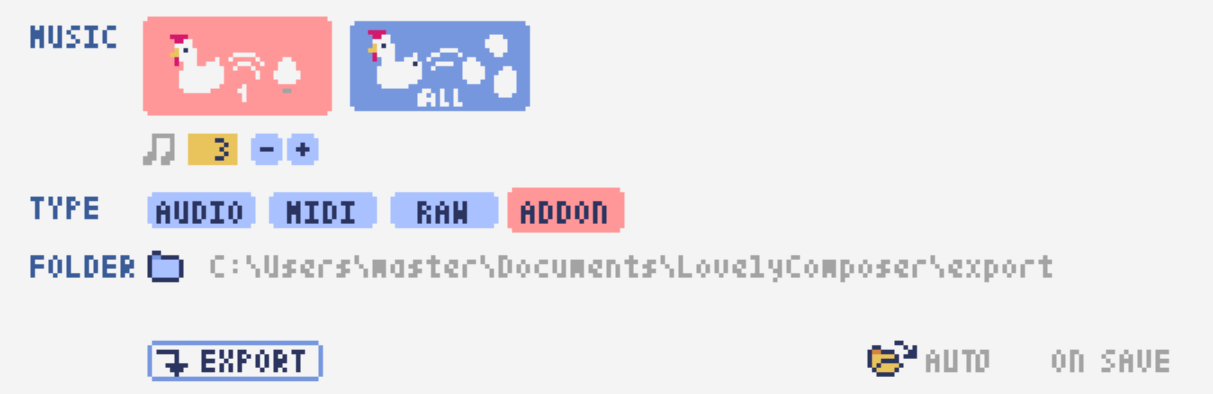
MUSIC - 1 / ALL button … Select whether to output all musics as a file or output only the selected music. If you select 1 MUSIC, you will be able to select the target music with the music number selector on the right. (The initial value is the number of the music selected on the music edit screen.)
TYPE … Selects which type of file to output. The options at the bottom of the screen will change depending on the type.
FOLDER … Specify the folder path to export to. Click the folder button on the left to open the folder selection dialog.
Folder open icon … Open the export destination folder with Explorer on the OS side.
AUTO button … When enabled (in color display), the export destination folder is automatically opened when the export process is completed.
ON SAVE button … When enabled, manual save operation on the edit screen will automatically export after the save is complete.
EXPORT button … Executes file output with current settings.
Wave export
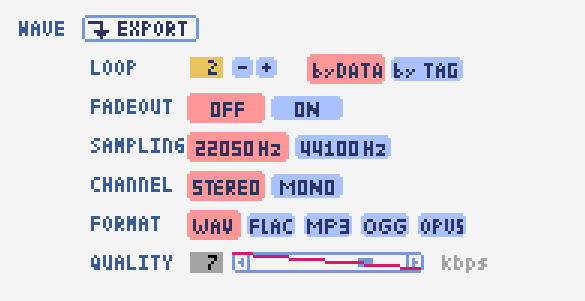
EXPORT button … Executes audio file export with the current settings.
LOOP … Set the number of times to play the loop section. (If it is 1, it will not be played repeatedly)
by DATA … Generates audio data for the specified number of loops.
by TAG … By embedding loop position information as a text tag in audio data, it supports infinite loop playback with a continuous intro in loop tag compatible software such as RPG Maker. (The number of loops cannot be specified.)
SAMPLING … Specifies the sampling frequency. 22050Hz is the default. (Currently, sound is processed internally at 22050Hz, and setting it to 44100Hz does not improve the sound quality on the data.)
CHANNEL … Specify whether it is stereo output (2ch) or monaural output (1ch). Stereo output is the default.
FORMAT … Select the audio file format. In the case of WAV, it is an uncompressed Wave format file, and other than that, it is a compressed audio format, and it is designed to be converted after the Wave file is output. (Wave file is also generated)
QUALITY … Sets the sound quality (compression level) of compressed audio. The higher the number, the higher the sound quality, but the larger the file size. The conversion parameters are grayed out on the right. (Valid only when other than WAV is selected in FORMAT)
When specifying tags in a loop method, OGG or Wave is basically recommended as the output file format. (Other than that, there are few compatible software, and even if it is compatible with MP3, skipping during a loop is unavoidable due to the specifications.)
We have confirmed that loop playback was possible with OGG for RPG Maker VX or later, and Wave for Unity. (At the time of 1.2.0 release. Operation is not guaranteed.)
When the loop is tagged, audio data for two laps is always generated. This is to connect the sounds continuously without any discomfort at the moment of returning to the loop start position from the end of the music (to prevent something like skipping).
MIDI export
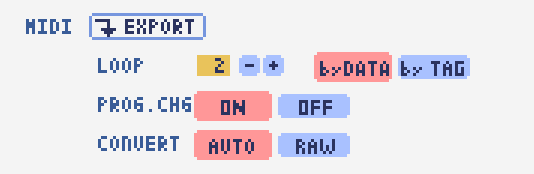
EXPORT button … Executes MIDI file export with the current settings.
LOOP … Set the number of times to play the loop section. (If it is 1, it will not be played repeatedly)
by DATA … Generates MIDI data for the specified number of loops.
by TAG … By embedding loop position information as a text tag in MIDI data, it supports infinite loop playback with a continuous intro in loop tag compatible software such as RPG Maker. (The number of loops cannot be specified.)
PROG.CHG. … Specifies whether to generate a program change (tone change). (If not enabled, all sounds will have the same tone.)
CONVERT … When AUTO is specified, MIDI data that has been processed such as connecting consecutive notes is output. (Default setting) / For RAW, the raw data of Lovely Composer is replaced with MIDI data and output.
RAW export
Outputs jsonl data in Lovely Composer format with the notes of the rhythm pattern expanded as note data.
Add-Ons Output (1.3.3 - )
Calls an external extension add-on to convert it. The location of the add-on is /USER DOCUMENT DIR/LovelyComposer/addon/export/. You can also create your own add-ons.
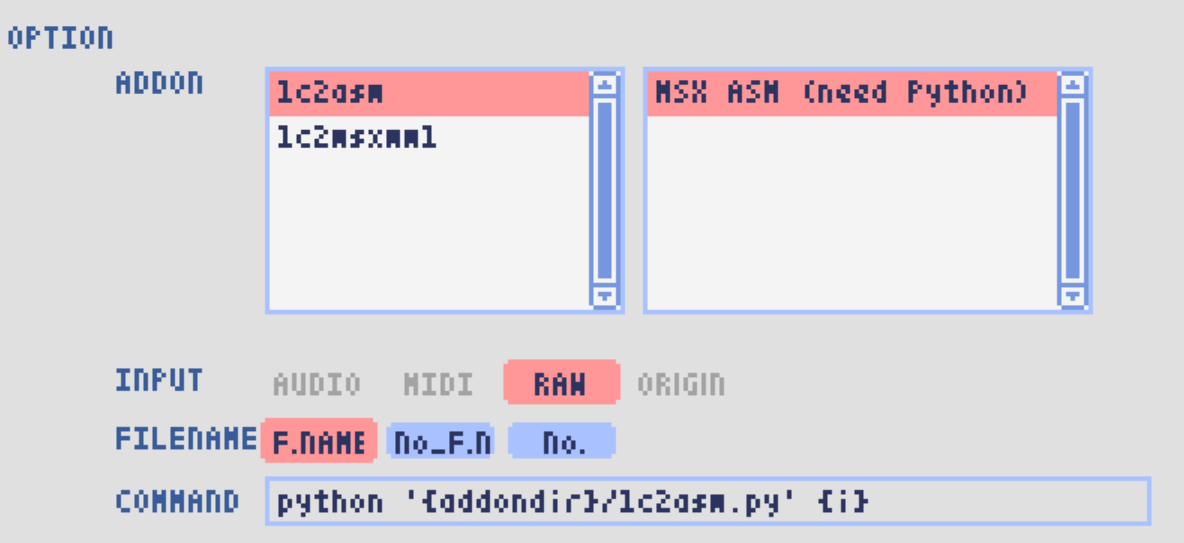
ADDON … Select an addon in the list box on the left. Select the conversion option provided for each add-on in the list box on the right.
INPUT … Select the file type used for the add-on’s input file. If the input file is specified on the add-on side, the user will not be able to select it. The input file will be generated with the current export settings just before the add-on is executed.
FILENAME … selects the output file name. F.NAME is the file name set for the song data (or song number if not set), No_F.N is the song number and file name connected by underscores, No. is the song number only.
COMMAND … displays the final command to be executed. Commands can also be rewritten directly. The variable of the input file name etc. can be used.
Config Tool
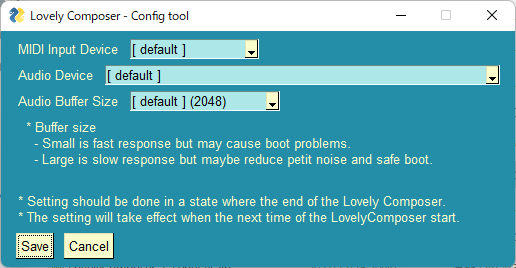
You can select the MIDI / audio device to use and set the audio buffer size.
The setting is effective when the Lovely Composer is started (if it is set while the Lovely Composer is running, it will not be reflected until it is restarted).
If the audio buffer size is made smaller, the response of playback and partial display will be faster, but if it is made too small, the sound may not be reproduced, noise may be mixed, and playback may become unstable. The optimum value depends on the PC environment.
Q & A
Cannot start … Case of a security warning appears
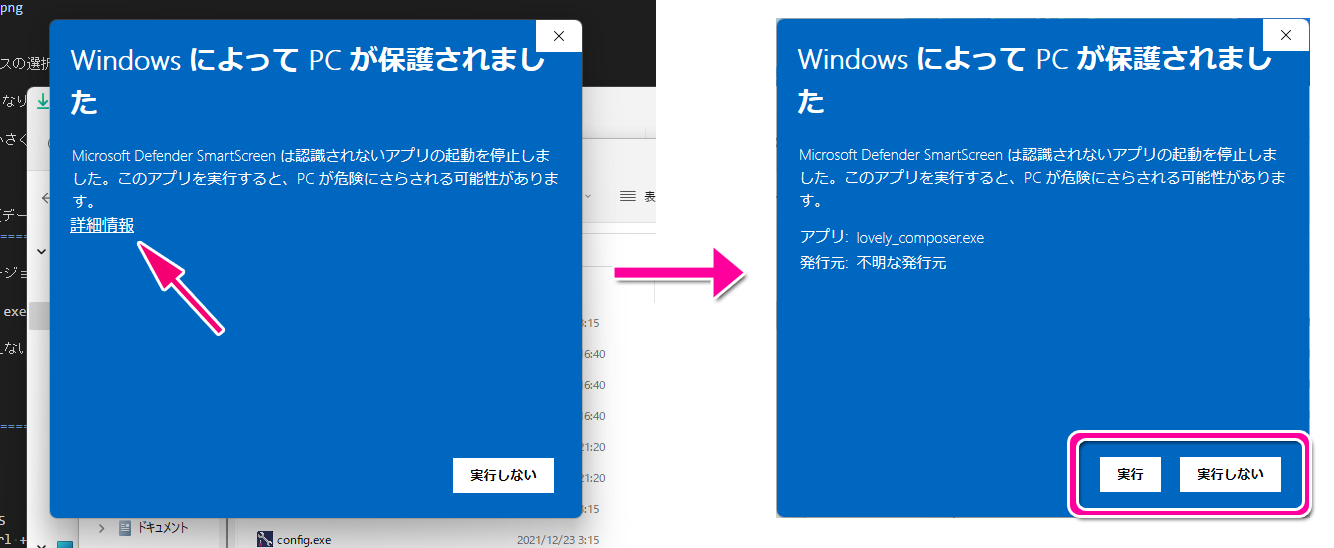
When starting for the first time after downloading Lovely Composer, the above warning may be displayed and the “Run” button may not be displayed in addition to “Do not run”. In this case, press “Details” at the location indicated by the arrow, and the “Execute” button will be displayed.
Software version upgrade (data migration method)
You can transfer music data by copying the music data folder of the previous version to the music data folder of the new version. The song data folder is located under the Lovely Composer folder / music /. (The music data file is “music number.jsonl (00.jsonl etc.)” in each folder.)
If you want to migrate your preferences, copy the app_settings.json file, which is in the same location as the executable file, to the new version.
Be careful not to make a mistake in the direction of the data copy! If you make a mistake and reverse it, the musics you have made will be lost. It is safe to make a backup in advance just in case. (There are plans to make it easier to update the version in the future)
Sound cracking, noise can be heard
If the waveform overflows and collapses on the output monitor, the sound will crack at that part.
The cause is that the sound is too loud. So it will be solved if you do not overlap the sounds too much.
If you turn down the volume with the master volume at the bottom right of the screen, it will disappear temporarily.
Avoiding tones with large waveforms is less likely to cause problems.
We want to prevent sound cracking as much as possible without the user being aware of it, but it is also a difficult because it is a fundamental problem of digital audio.
Can’t open the music file
An error message will be displayed on the score as to why it cannot be opened, so please check it.
Data created in the old version can be opened in the new version, but not the other way around. Please make sure that you can open it with the latest version.
Unable to save music file
When a music for which file write protection is set, such as a sample music is opened (The music number is displayed in red), the file cannot be saved. Select a user folder, etc. (If you have already entered the data, press the copy button of the music and then paste the music to another music number.)
Check if the music data file has write permission on the OS side.
Add a new folder
Duplicate (copy and paste) the LC_USER folder on the OS side and rename it that you want. (Only half-width alphanumers and symbols)
Even if you create only a new folder, it will not be displayed in the folder list. (It is necessary for “lcdata.jsonl” to be included for now)
Shortcut Keys
General operation
Save file … Ctrl + S
Export file … Ctrl + E
Undo … Ctrl + Z
Redo … Ctrl + Y
Copy … Ctrl + C
Cut … Ctrl + X
Paste … Ctrl + V
Select all … Ctrl + A
Deselect … Esc
Delete selected … Delete
Full screen … Alt + Enter
Open online manual of current screen … F1 (ver.1.2.6 or later)
Open user guide … F2 (ver.1.2.6 or later)
Music edit screen
Play / Stop … Space
1-page loop setting … O (Oh)
Go to next page … -> or Shift + X
Go to previous page … <- or Shift + Z
Part selection … 1,2,3,4,5
Tool select
Pen … Q
Eraser … W
Brush … E
Selection … R
Chord select
Mute … Shift + A
Major … Shift + S
Minor … Shift + D
Dim … Shift + F
Aug … Shift + G
SUS4 … Shift + H
7th … Shift + C
9th … Shift + V
Power … Shift + B
Next tone list … Ctrl + W
Previous tone list … Ctrl + Q
Open the next song … Ctrl + 2
Open the previous song … Ctrl + 1
Parallel movement of the mouse cursor … Hold down Shift
Volume input on the Note Input tab … Hold down Alt and use the Pen tool
Duplicate selected notes … Alt-drag selection
Repeated duplicate of selected notes … Ctrl + D
Copy of rhythm pattern settings … Alt + C
Paste rhythm pattern settings … Alt + V
Software keyboard
Performance … Lines of A and Z are the rows of piano keys
Raise one octave … Page Up
1 octave down … Page Down
Temporarily raise one octave … While holding down of up arrow
Temporarily lower by one octave … While holding down of down arrow
File write protection setting … Ctrl + Alt + L
Specification
Number of parts: User 4 parts + chord rhythm pattern (tone can be changed for each note)
Song length: 32 notes * 256 pages (up to 1024 bars)
Range: C1 to B7 (MIDI standard, 7 octaves)
Tones: 50 patterns (when counted as one with the combination of “basic waveform + effect”)
Volume: 16 steps (1 step 2 dB, 0 is silence)
Channels: Stereo (Pan is only Center / Left / Right)
Supports Loop play with intro
Wave file export
MIDI file export
Supports MIDI keyboard (for sound confirmation / simple performance. Data input, recording, UI operation, etc. are not possible)
Auto save
Detailed specifications
Data created in the old version can be opened in the new version, but not the other way around. (For example, music data created in ver.1.0 series can be read in the same way in ver.1.1 series. However, conversely, data created in 1.1 cannot be opened in 1.0.)
Musics created in Pro mode will play in the same way even when Pro mode is OFF.
If the data specifications change, the second version number (1.x.0) will change. For updates that do not change the data specifications, the version number at the end will change. (1.1.x etc.)
Add-ons
Export Add-ons (ver.1.3.3 - )
A system is provided to automatically execute a user-prepared file convert program by calling it at export time. The program is executed by passing arguments to an executable file or script on the command line. It can be used for game production, etc., and can also be created by the user with a little work.
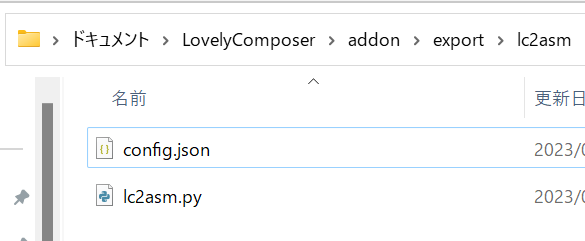
Folder Structure
An addon is a collection of dedicated configuration files and executables or scripts in a single folder. Add-ons are located at /user document folder/LovelyComposer/addon/export/.
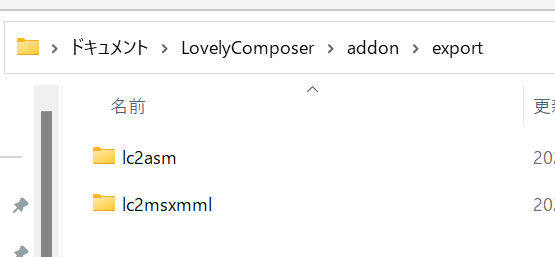
Each folder corresponds to one add-on.
About the configuration file
You must have one configuration text file like the sample below in your add-ons folder named config.json.
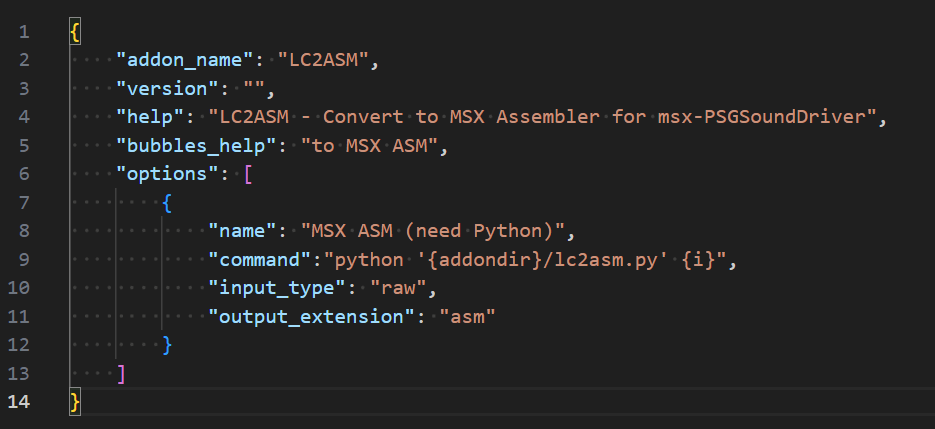
addon_name … An arbitrary string representing the add-on name.
version … An arbitrary string representing the version.
help … An arbitrary string used for the description. It will be displayed at the bottom of the screen, etc.
bubbles_help … Arbitrary string used for bubbles pop-up help.
options … One to multiple option selections in an array of objects. Must be an array even if there is only one option.
File paths in the command must be enclosed in quotation marks at the end. ( Characters assigned to variables {i} and {o} include quotation marks, so they are unnecessary. )
Option
name … Arbitrary string for option name.
command … Specifies the command line to execute. Variables can be used (see below). * If you specify the name of the executable file without the extension, a file with .exe appended will be called on Windows, and a file without the extension will be called on Linux.
input_type … Select the format of the input file. audio / midi / raw / origin Specify one of the following as a string. origin is the Lovely Composer’s song data format itself, and raw is the rhythm pattern expanded into notes and added to it. It is generated with the settings selected on the export screen and used as the input file.
input_audio_format … Valid only if audio is specified in input_type. Specify one of wav / flac / mp3 / ogg / opus as a string. Not required.
output_extension … Specify the extension of the output file as a string. No period is required.
Command variables
The following variables are allowed in command.
{i} … The input filename is assigned. The full path string, enclosed in quotation marks.
{o} … The output filename is substituted. The full path string, enclosed in quotation marks. The input filename extension is replaced by the one specified in the output_extension option.
{basename} … Only the filename without extension is substituted.
{addondir} … The full path to the selected add-on will be substituted.
{exportdir} … The full path of the destination folder will be assigned.
Precaution
Please note that only single-byte alphanumeric characters and some symbols are displayed on the application.
Add-ons are loaded when Lovely Composer is launched. If you want to update the add-ons and reload them, please restart the application.
File paths must be enclosed in quotation marks at the end or they will not work properly. If you use basename, addondir, etc., please put them in quotes.
Details of the error will be output to a log file. Open the /PROGRAM DIR/log/app_log.log file by opening it with a text editor. The log will be written to text when the application is terminated.
Please also refer to the sample add-ons included in the package.
We do not provide any support for each of the included add-ons (we are not responsible for any disadvantages or obligated to improve them). The developer of each add-on also assumes no obligation for any support or liability for any disadvantage.